A better way to tie down plastic on a caterpillar tunnel
Most caterpillar tunnel providers give you a long spool of nylon rope. Then you tie it off at one carabiner, then loop it over to the otherside , one bow forward, then back other so you are two bows ahead on the side you started on, and so on. Until you get all the way to the end then come back. So one single length of rope is used for the entire tunnel.
But after some wind troubles, and generally having issue adjusting the ropes, I put my plastic back on using individual lengths of rope using trucker’s hitch knots. The advantage is if one rope breaks, the whole length of the structure will not come loose. I also don’t have to worry about tightening the entire tunnel if one section is a bit loose and then trying to manage moving the slack all the way back to the end. And these slip knots are so much easier to deal with. I saw Jean Martin Fortier did this in his short video – https://www.youtube.com/watch?v=0DnFGOb6hGU&t=379s and here is a general video on how to tie these knots https://www.youtube.com/watch?v=RK5gE-3wuGI
Below is a picture of my tunnel with the new setup. The 2:1 mechanical advantage lets you get a section a lot tighter, too. I used a bowline knot on the starting side which you can see. If you do this, you’ll need a bit more rope most likely. I was only one section short using the rope the tunnel came with. Its already weathered 50 MPH winds much better than before.
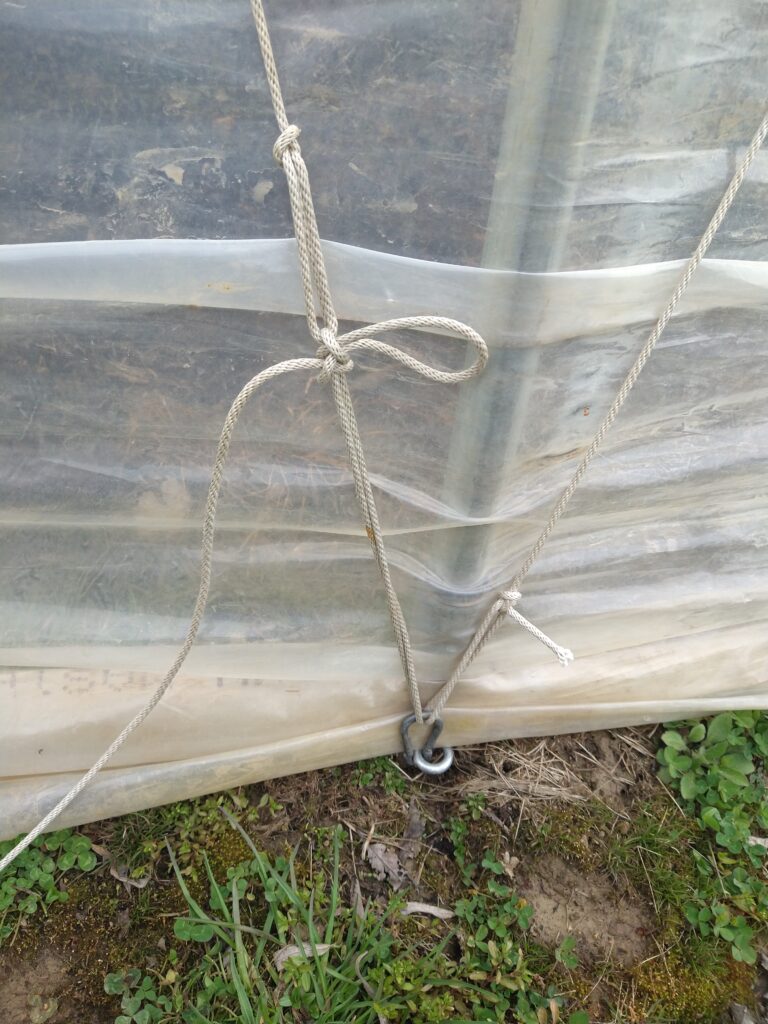
One tip for when you are pulling the rope over on the side where the hitch will be – pull the slack up to about 4-5 feet decently tight through the carabiner. Then tie the slipknot. That will leave you enough slack to pull through and tighten it down.